The following components need to be configured before this app can be used.
- Identify the Oracle Eloqua user who has access to this app within the Oracle Eloqua instance installed.
- Configure the Salesforce instance the application will connect to.
- Configure the “base” Salesforce object that the segment will be based on.
- Configure field mappings against the base Salesforce object and Eloqua Contact table
- Configure data import priority to be applied to an external system object.
To modify configuration settings, navigate to Apps, select your app, and click the Configure icon.
Warning: Selecting the Reinstall icon ![]() will force you to go through the entire configuration process again. The app will be unavailable for all users during the reinstall.
will force you to go through the entire configuration process again. The app will be unavailable for all users during the reinstall.
Configuring Connections in the External Data Intelligence App #
The Connections page lists all of your CRM connections and associated credentials.
- To add a connection to a Salesforce instance, click the Plus icon
 .
. - Complete the connection details.
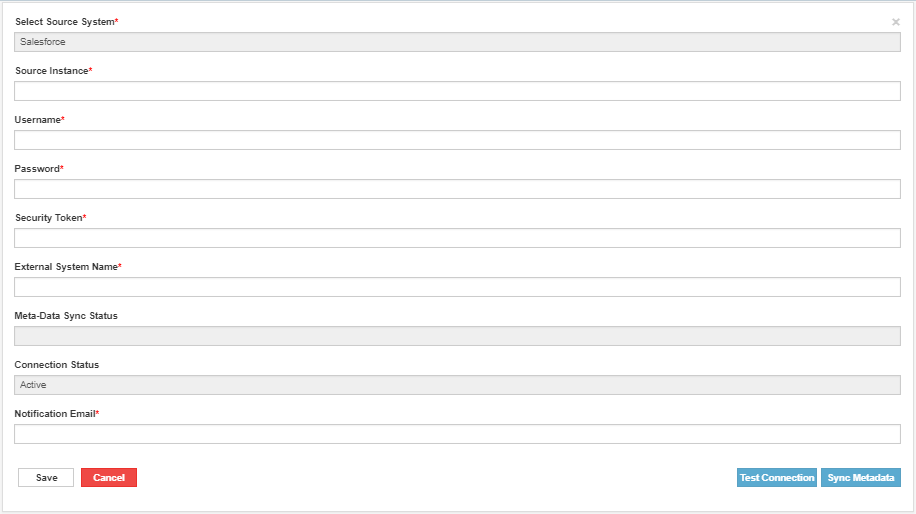
- Source instance: Choose between one of the following values depending on the type of Salesforce instance you are connecting to: Production, Sandbox, Dev
- Username: Enter user name credentials for the connection.
- Password: Enter password credentials for the connection.
- Security Token: Salesforce security token associated to the credentials for the connection.
- External System Name: Name of the Salesforce name as it will be displayed in the segmentation user interface.
- Meta-Data Sync Status: Status of the meta data sync between Salesforce and External Data Intelligence app.
- Connection Status: Status of the current connection.
- Notification Email: Email addresses entry (separated by commas) to the individuals that should be getting a notification when an error is encountered.
- Click Save
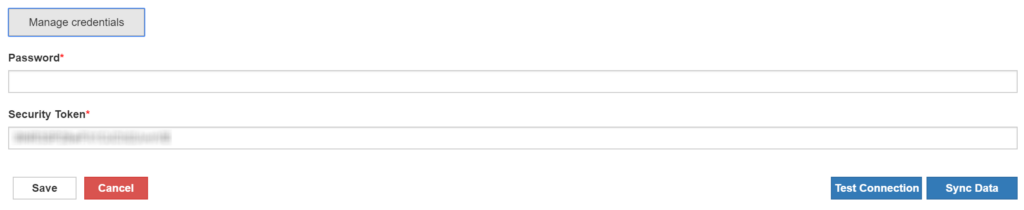
In order to reset the password, click Manage Credentials.
Configuring connection using Salesforce Connected App #
Overview #
A connected app is a framework that enables an external application to integrate with Salesforce using APIs and standard protocols, such as SAML, OAuth, and OpenID Connect. Connected apps use these protocols to authenticate, authorize, and provide single sign-on (SSO) for external apps.
Prerequisites: Salesforce connected app: Create a connected app in Salesforce so that you can get the following values to enter when creating a connection:
Consumer key: Displayed in the Salesforce connected app after creation.
Consumer secret: Displayed in the Salesforce connected app
Configuration:
The Connections page lists all your CRM connections and associated credentials.
- To add a connection to a Salesforce instance, click on the Plus icon

- Complete the connection details.
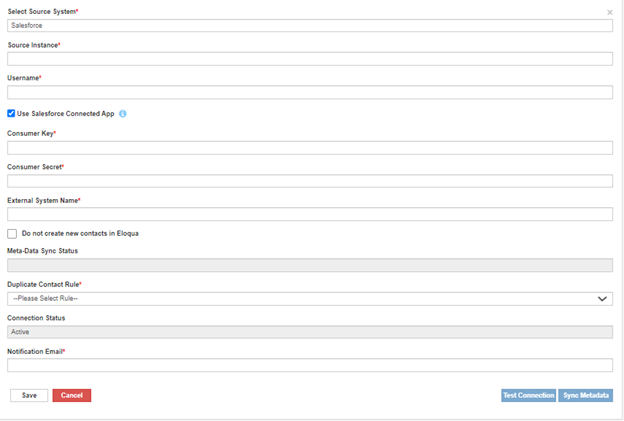
- Select Source System: Choose between one of the following values depending on the type of Source System you are connecting to Salesforce or Snowflake.
- Source instance: Choose between one of the following values depending on the type of Salesforce instance you are connecting to either Production, Sandbox, or Dev
- Username: Enter user name credentials for the connection.
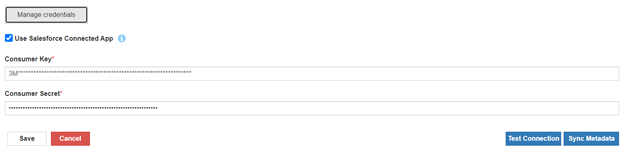
- Connected App: Check/Uncheck based on Salesforce connection type.
- Consumer Key: Enter the consumer key for the connection.
- Consumer Secret: Salesforce consumer secret key associated with the connected app.
- External System Name: Name of the Salesforce name as it will be displayed in the segmentation user interface.
- Meta-Data Sync Status: Status of the metadata sync between Salesforce and External Data Intelligence app.
- Connection Status: Status of the current connection.
- Notification Email: Email addresses entry (separated by commas) to the individuals that should be getting a notification when an error is encountered.
- Click on Save.
- A Salesforce login dialog is displayed.
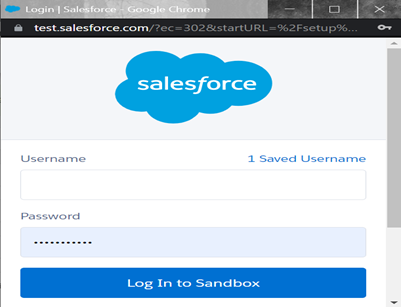
- Click the default user name or login with a different user name. The Allow Access? dialog is displayed.
- ‘Click Allow. If authentication succeeds, your connected app is ready to be used.
- Click on Test Connection Button and Check the Connection status.
- To reset the connection details, click Manage Credentials.
Creating Connected App #
Overview #
The following instructions are based on Salesforce Classic. For Lightning Experience and Classic details, read Salesforce’s connected app documentation.
Creating Connected App #
- Go to https://login.salesforce.com/ OR https://test.salesforce.com/ and log in to your Salesforce account.
- Click on
 (Gear Icon) from the top right, select Setup.
 - In the left panel Apps, select Apps > App Manager theApps page is displayed.
- In the Setup section, click NewConnected App the New Connected App page is displayed.
- Enter the following required values and any optional values if needed:
- Connected App Name: Enter a descriptive name such as External Data Intelligence Integration
- API Name: You can accept the default value or enter a different name.
- Contact Email: Enter the email address of the user who will manage the connected app.
- In the API (Enable OAuth Settings) section, select Enable OAuth Settings. Additional options are displayed.Keep the Require Secret for Web Server Flow option, which is selected by default.
- Enter Call back URL, (https://edi.portqii.com/decisionService/getSFDCOAuth)
- In the Selected OAuth Scopes section, select the appropriate scopes or select all available scopes.
At a minimum, the following scopes are required:
- Access your basic information (id, profile, email, address, phone)
- Access and manage your data (API)
- Provide access to your data via the Web (web)
- Perform requests on your behalf at any time (refresh_token, offline_access)
The custom_permissions scope is recommended. Determining whether it is needed depends on your Salesforce configuration.
- Click on Save.
- Select Create > Apps.
- In the Connected Apps section, find your connected app in the list and click on its name.
- In the connected app’s API (Enable OAuth Settings) section, record the Consumer Key and Consumer Secret values.
Configure Snowflake connection #
Overview #
Snowflake is a data warehouse on top of the Amazon Web Services or Microsoft Azure cloud infrastructure. There is no hardware or software to select, install, configure, or manage, so it is ideal for organizations that don’t want to dedicate resources for setup, maintenance, and support of in-house servers.
Configuration #
To enable it please contact support@portqii.com for license and to get it installed in your instance. Once the license is enabled, must be configured on the application’s Admin Configuration page by the users who have Admin access:
The Connections page lists all your CRM connections and associated credentials.
- To add a connection to a Snowflake instance, click the Plus icon
- Complete the connection details.
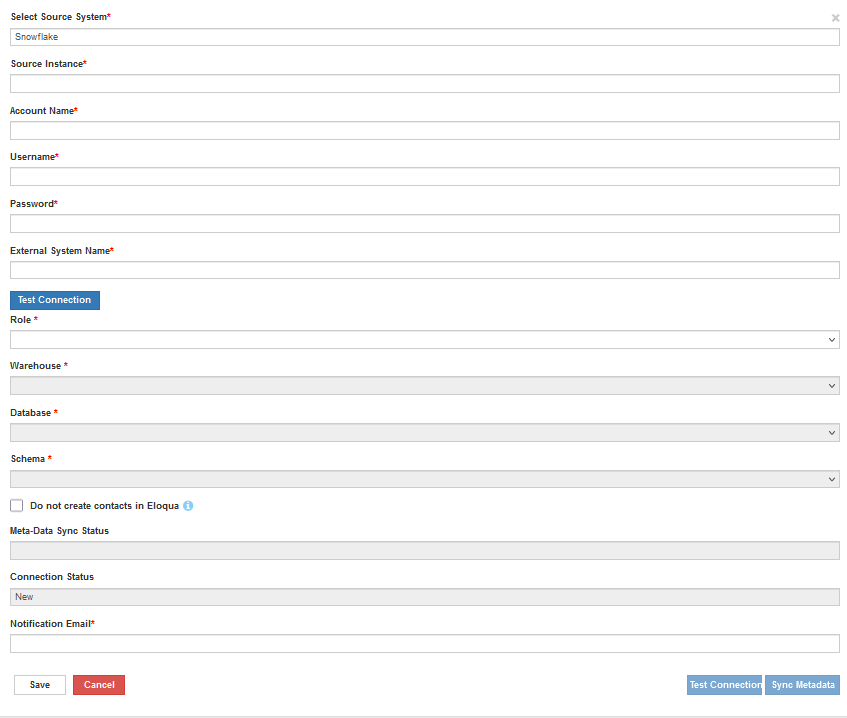
- Select Source System: Choose between one of the following values depending on the type of Source System you are connecting to Salesforce or Snowflake
- Source instance: Choose between one of the following values depending on the type of Snowflake instance you are connecting to Production.
- Account Name: Enter account name credentials for the connection.
- Username: Enter user name credentials for the connection.
- Password: Enter password credentials for the connection.
- External System Name: Name of the Snowflake instance as it will be displayed in the segmentation user interface.
- Test Connection: To verify Snowflake connection.
- Role: Choose the Snowflake user role.
- Warehouse: Choose the Snowflake warehouse.
- Database: Choose the Snowflake database.
- Schema: Choose Snowflake database schema.
- Do not create contacts in Eloqua: Choose whether to create new contacts in Eloqua or not. Checking this checkbox will prevent the new contacts creation in Eloqua.
- Meta-Data Sync Status: Status of the metadata sync between Snowflake and External Data Intelligence app.
- Connection Status: Status of the current connection.
- Notification Email: Email addresses entry (separated by commas) to the individuals that should be getting a notification when an error is encountered.
- Click on Save.
- To reset the password, click on Manage Credentials.

Configuring External System Objects #
Adding external system objects will allow marketers to segment against these objects in the external system. External system objects added here will be imported into the Oracle Eloqua Contact table when executing the segment.
- Click the Menu icon
 against the configured external system connection and select Configuration. A list of existing configured connections will be shown to the user.

- To add an external object to execute segments against, click the Plus icon
 .
. - Choose the object and then click the Add button.

NOTE: Only objects containing an email address will be shown from the list of available objects. This is because records from this object will be imported into the Contact table in the Oracle Eloqua instance.
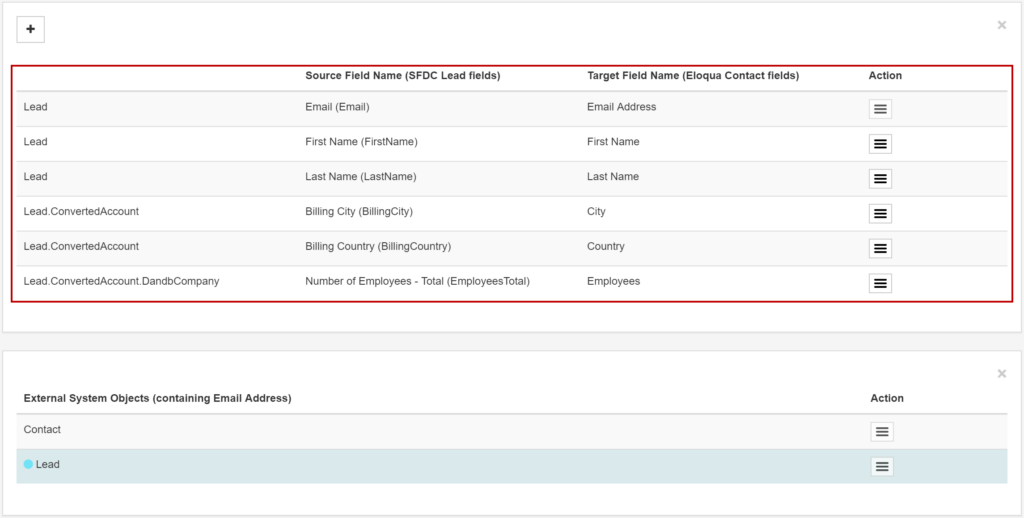
Configuring Field Mapping #
Field mappings are configured for external objects added in the configuration setting of the app. This allows data to be imported to the Oracle Eloqua Contact table from the base object of the external system plus any parent object from the base object.
- Click the Menu icon
 against the added external system object and select Field Mapping. A list of existing configured field mappings will be shown to the user.
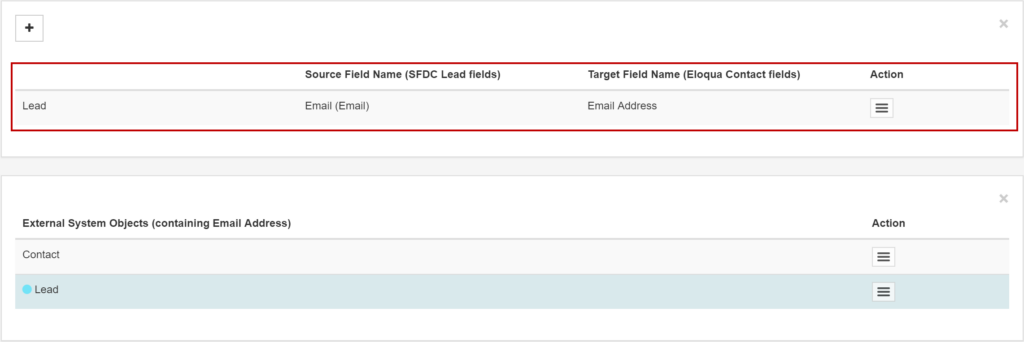
NOTE: By default, at least one field of type Email will be added by the system. This is to ensure that the system is passing in an email address field as it will be used as a match field for existing records that already exist in Oracle Eloqua.
- To add more fields to the field mapping click the Plus icon
 .
. - Choose the field from the base external system object (defaulted) or a parent object. Users can choose to map fields from parent objects 5 levels above the base external system object.
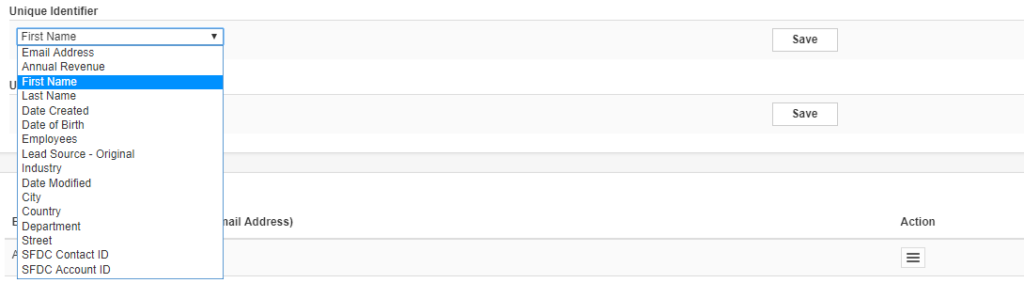
- Choose the Unique Identifier field and Update Rule that has to be applied during file import. Users can choose to select any mapped field as Unique Identifier and choose an action from Update Rule dropdown.


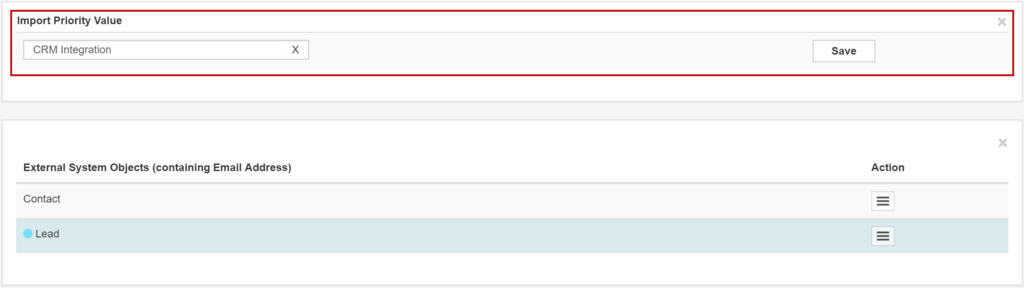
Configuring Data Import Priority #
Data priority compares new data to existing data, then determines whether to update contact data depending on the source. Further information on how Oracle Eloqua’s data import priority works can be found here.
- Click the Menu icon
 against the added external system object and select Set Import Priority.
 - Select one of the import priorities configured in the Oracle Eloqua instance and click Save.
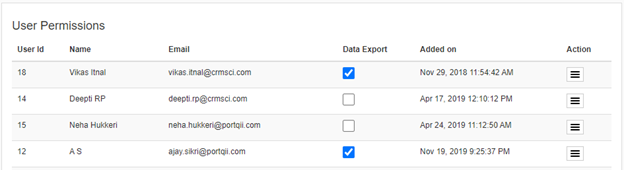
Selecting User Permissions #
The use of this application is only available to those users that have been given permission by the Oracle Eloqua administrator in which the app is installed in.
- To add a single user, type the user name under the Single User tab. As the user types ahead a list of users will become visible allowing the administrator to select one user from the list of users matching the search term.

- Clicking the Plus icon
 will add the user to grid below giving that user permission to use the app.
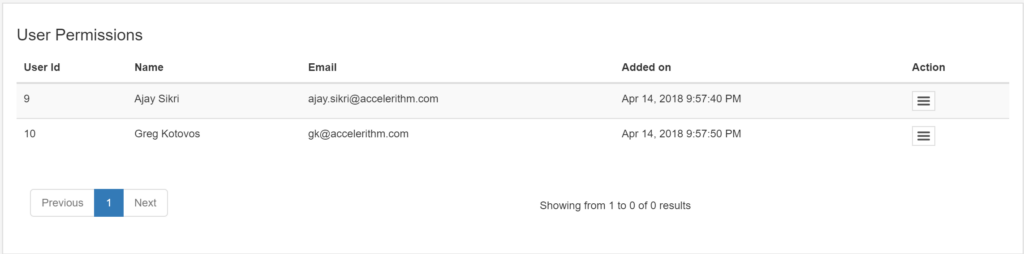
- Multiple users can also be added by searching for users under the Multiple Users tab and adding one or more user that meet the search criteria.
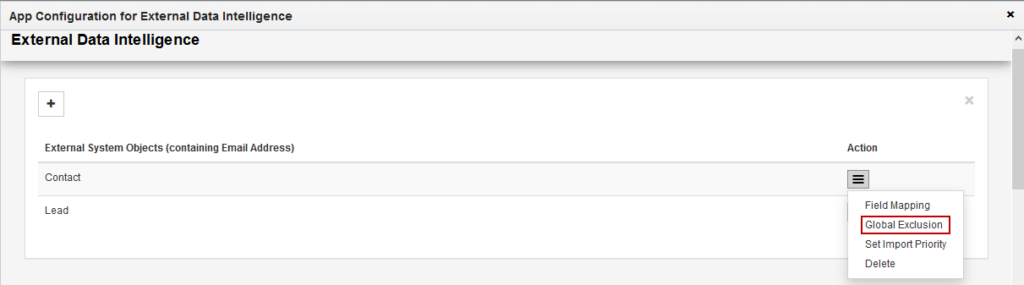
Configuring Global Exclusion Criteria #
Global Exclusion Criteria will allow marketers to create segments with an automatic built in Exclusion Criteria. Once configured this exclusion criteria will apply to ALL feeder instances (new and existing) depending on the type of configuration. If an exclusion criteria is changed then ALL existing feeder instances will be updated. Note that end users configuring feeder instances will NOT be able to change the exclusion criteria. Only Admins will be allowed to define and adjust these exclusion criterias.
- Click the Menu icon against the added external system object and select Global Exclusion.
- In the left pane
 click Add. Then click on the following options
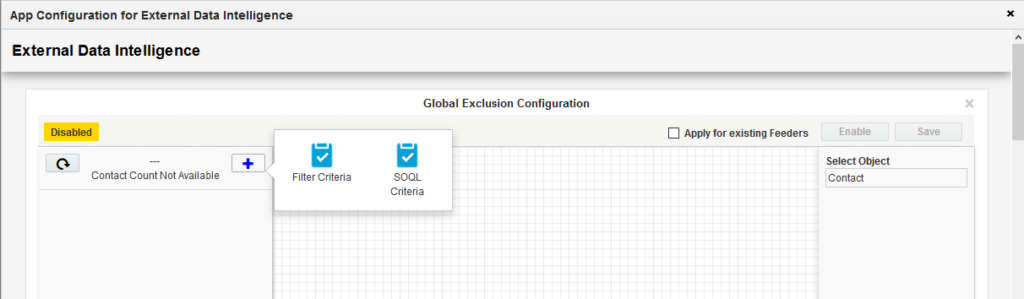
- Filter Criteria: Filter contacts based on data about the contact in the external system. For example, filter a lead with a status of ‘Qualified’ and linked to an opportunity in a stage of ‘Negotiation’. Filters are a powerful component of segmentation and you can include multiple filters to make sure you reach your target audience.
- SOQL Criteria: Filter contacts based on an advanced segment that is not possible to build via the graphical user interface
- Choose to build your filter criteria condition using fields from the base table or from tables related to the base external object selected. Click Save once the filter criteria is defined.
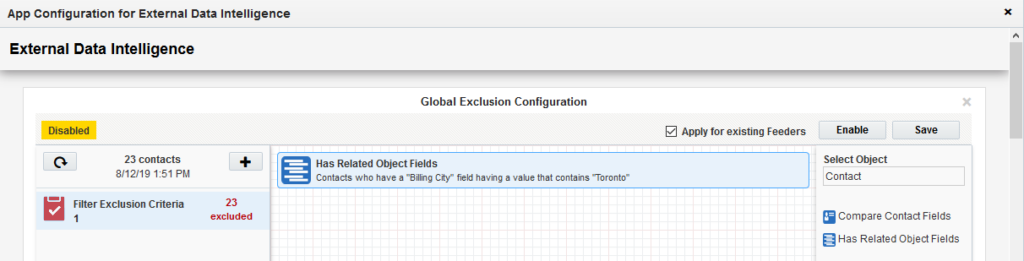
- Click on Enable to apply Global Exclusion Criteria to the New Segments. Click on Apply for Existing Feeders to apply Exclusion Criteria to all Existing and New feeders. This will exclude the contacts to be imported into Eloqua.

- To Disable the Exclusion Criteria, click on Disable. This will not allow Exclusion Criteria to be applied to New Segments. Click on Apply for existing Feeders and then on Disable button to remove Exclusion Criteria from existing feeders and also to not allow Exclusion Criteria to be applied to new Segments.

Do not create contact in Eloqua #
Overview #
Do not create contact in Eloqua is a helpful feature when a user does not want to create a new contact from an External system* to Eloqua, this feature allows the user to just update the already present contacts in Eloqua.
Configuration #
The user needs a license for Do not create contact in Eloqua. To enable this feature please contact sales@portqii.com to get it installed in your Eloqua instance. Once the license is enabled it must be configured on the application’s Admin Configuration page by the users who have Admin access:

The Do not create contact in Eloqua feature can be enabled/disabled in the following manner:
- Navigate to the EDI Admin Configuration page.
- Edit or add a new connection.
- Proceed to Do not create contact in Eloqua and enable the checkbox.

- After enabling this feature, EDI will process the contacts using Segments and Picklists (By default EDI will create 10 segments and picklists).
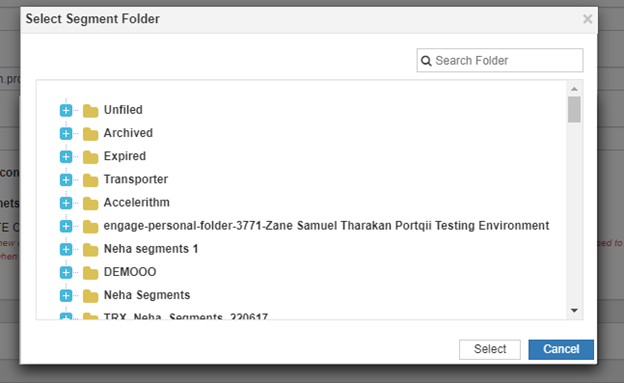
- Admin can select the folder by clicking on the edit icon on the right side, on click of edit one popup will open showing the folder list user need to select the folder, selected folder will be used for store created segments.
- Now the DO not create contact in Eloqua is enabled for use.
Do not create contact in Eloqua #
When the Do not create contact in Eloqua feature is enabled if we find any Feeder or Decision Service activated for the connection that has the feature enabled. The system will check if already segments and picklists are there in the system it will use those to ensure to not create new contacts in Eloqua. If the feature is disabled Feeder service will Create/Update contacts in Eloqua that, we get from the salesforce query.
Notes #
- If the feature is enabled for the connection, on activating a feeder or decision EDI will create 10 segments and picklists.
- If found any picklist or segment is deleted System will auto-create a new segment or picklist.
- If there are more than 10 active feeder or decision services then we are creating segments and picklists dynamically(Based on the number of Active Instances) and deleting them once all records are processed.
*This feature now available for both Salesforce and Snowflake connections.
Duplicate contact in Salesforce #
Overview #
Duplicate contact rule is a helpful feature when users have multiple contacts in salesforce with matching query criteria and the same email address. Eloqua does not allow to import contacts with the same email address.
Configuration #
The Duplicate contact rule must be configured on the application’s Admin Configuration page by the users who have Admin access:

The Duplicate Contact Rule can be applied in the following manner:
- Navigate to the EDI Admin Configuration page.
- Edit or add a new connection.
- Select Duplicate Contact Rule.
There are Four Duplicate Contact Rule
- Import Everything: It will import all, all duplicates will not be going to flow.
- Ignore all duplicates and do not import: It will remove all duplicates before importing to Eloqua.
- Choose the youngest record by the last update date: it will import the latest modified record among duplicates to Eloqua.
- Choose the oldest record by creation date: it will import the oldest created record among duplicates to Eloqua.
Duplicate Contact Rule #
If the user has multiple contacts in salesforce with matching query criteria and same email address, and the duplicate contact rule selected in EDI Admin or Feeder Level it will import contacts based on the selected Duplicate Contact Rule.
Export Contact #
Overview #
Export Contact will help in exporting the contacts from Salesforce based on configured query and mapping.
Configuration #
For the Export Contact feature user must have the Data Export access on the application’s Admin Configuration page by the users who have Admin access:
The Export Contact feature user access can be enabled/disabled in the following manner:
- Navigate to the EDI Admin Configuration page.
- Under User, Permission Enable/Disable the Data Export.
Export Contact #
Following are the steps to be taken to initiate Export Contacts:
- Navigate to the EDI Feeder Service.
- Configure the Salesforce query and save the Feeder.
- Once saved View Contact button is enabled.

- After the view contact popup is opened, click on Export.

- On click of Export, it will check the user Access and download an Excel file (Maximum limit 50k Contacts).
Notes #
- If the user does not have export access it prompts User does not have access to Export.
- If the contact count is more than 50k it will ask whether the user wants to export the top 50K contacts.
Configuring Static Field Mappings on EDI(Salesforce and Snowflake) #
This feature lets users update Eloqua contacts with some Static values along with mapped Salesforce or Snowflake field values when importing contacts into Eloqua through EDI. As an example, if there is a requirement to know from where the contact information has been entered to Eloqua recently, adding a Static field that you can configure to contain the desired value can help the business know the recent source of contact update. This can be achieved through the admin settings or also at the EDI segment level. The following feature is available on both SFDC and snowflake connections.
Configuring static fields in Admin Settings and campaign level field mappings #
- Navigate to the EDI Admin configuration page.
- Click on the Configuration option from the dropdown menu on the Salesforce or Snowflake connection.
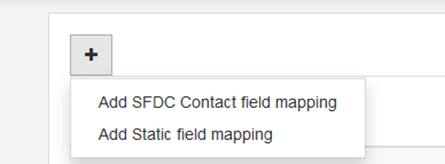
- Choose the Object you want to add to the Static field mapping and click on the field mapping option

- Clicking on the + symbol will give you the option to add either SFDC fields (Snowflake fields for Snowflake connection) or Static fields. Choose ‘Add static field mapping ‘.
- From the screen below, choose the data type of the field (Supported data types: Text, Numeric), give a label to the static field, choose the Target field from all Eloqua Contact fields dropdown, and then enter desired Static field value. Now you are set to add the static field to your field mappings.

- Click on Add button to add it to your field mappings. You can add more than 1 static field to your field mappings and/or choose to delete any of these field mappings anytime.

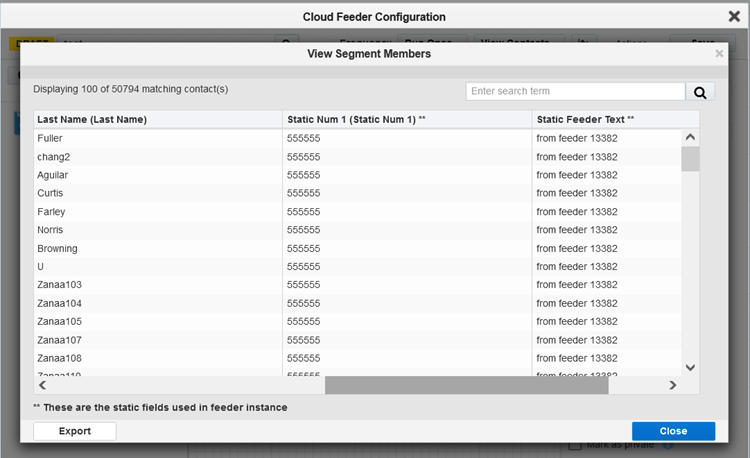
- Creating an EDI salesforce or snowflake feeder inside your campaign and clicking on view contacts will show you these static field values along with other salesforce or snowflake fields from Admin settings. These Static fields are suffixed with ** and an info message at the bottom of the table to differentiate them from the other Salesforce or Snowflake fields.
- Users can also choose to override Admin level field mappings and add new/delete existing static fields at the feeder level. Go to Field Mappings on the feeder as shown below and repeat the actions mentioned in steps 4,5 and 6 to configure the feeder level field mappings.

- If needed, users can configure static fields on the Decision instance by going to the field mapping section. This will update the contacts which flow through the Yes path, with the field value configured.
Note #
If the user has opened the field mappings on the Feeder and Static field values are added in Admin settings later, then that feeder no longer receives the updated field mappings from the Admin page and will not reflect new field mappings. In such cases, the user must configure desired field mappings on the feeder.
While configuring static field mappings, make sure that static field data type and the Eloqua contact field data type match. Any mismatch in field type will cause errors in the campaign when activated.
Configuring Picklist Field for Snowflake #
A Picklist is defined as a widget that shows a list of selectable options. When an option is selected, it is displayed as selected and the value of the read-only input is updated to match it. The picklist is a great way to keep data consistent and safe.
As Snowflake does not support the Picklist datatype, in External Data Intelligence applications we are providing a new feature to reuse the string field as picklist at the application level.
Configuring Picklist Fields in Admin Settings. #
- Navigate to the EDI Admin configuration page.
- Click on the Configuration option from the dropdown menu on the Snowflake connection.
- Choose the Object you want to add to the Picklist field mapping and click on the field mapping option.

- Clicking on the + symbol will give you the option to add or Static fields. Choose to add Snowflake field mapping.
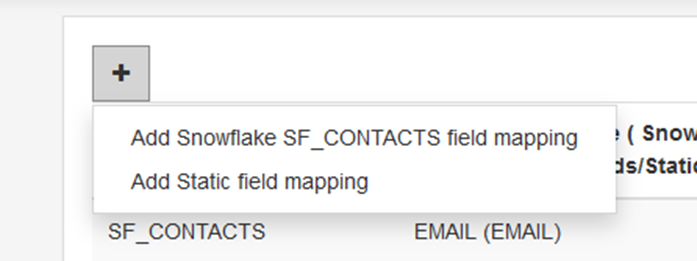
- From the screen below, choose the field from the base external system object (defaulted) or a parent object. Along with the mapping mark the checkbox to change the field as a picklist field and add it to the field mapping.

- Click on Add button to add it to your field mappings. You can add more than 1 Picklist field to your field mappings and/or choose to delete any of these field mappings anytime.
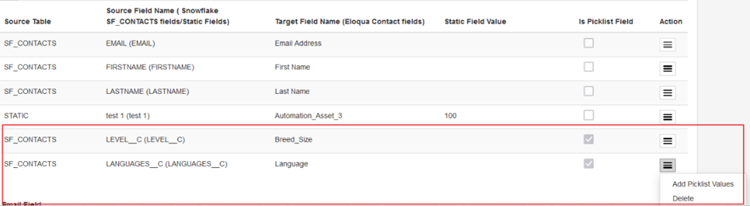
Configuring Picklist Value in Admin Settings #
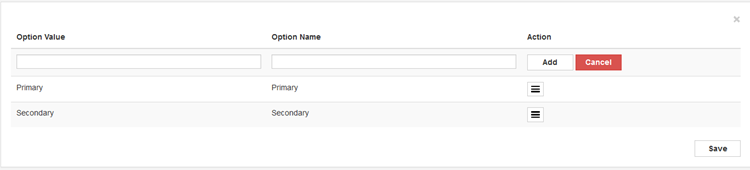
- After configuring the Picklist field mapping, click the Menu icon to add picklist values.

- Save the values to make the field a picklist.
Converting the Picklist field back to the normal field. #
- Delete the picklist field mapping from the admin page.
- Do the sync metadata again.
- Re-add the field by unchecking the ‘Is picklist field?’ checkbox (non-picklist field).
* We are releasing the automated feature to revert the Picklist field to normal in our upcoming releases.
EDI Errors and Admin Notification Process #
This process is designed to add to the categories of people who receive notifications. From now on, apart from Portqii developers, even the EDI administrators will be notified of EDI related errors. The email address on the EDI admin configuration page is considered as the admin email – error notifications are sent to that email id.
Admin will be notified in case of following errors:
| Type of error | Area affected | Type of Notification |
| Invalid credentials/ expired credentials | All the active feeder/Decision service using the connection | Notification email will be sent immediately at the 1st occurrence of connection failure. If not handled in 24 hours, then a 2nd email will be sent. |
| Invalid field name -SOQL error (Occurred due to change in source field name/deletion of the field) | Active Feeder/Decision service using the Invalid field reference | Notification email will be sent immediately at the 1st occurrence of an SOQL error. If not handled in 24 hours, then a 2nd email will be sent.Apart from the EDI admin, even the creator of the service will be notified. |
| Eloqua error | Active Feeder/Decision service | In case of Eloqua errors on Feeder/Decision service, EDI’s retry mechanism has 3 retries to prevent the error status. But if incase it fails to execute the Feeder/Decision service even after 3rd retry, then the notification email will be sent. |
All the Notification emails sent from PortQii support will be CC’d to have PortQii Team members on the email.